

How it works
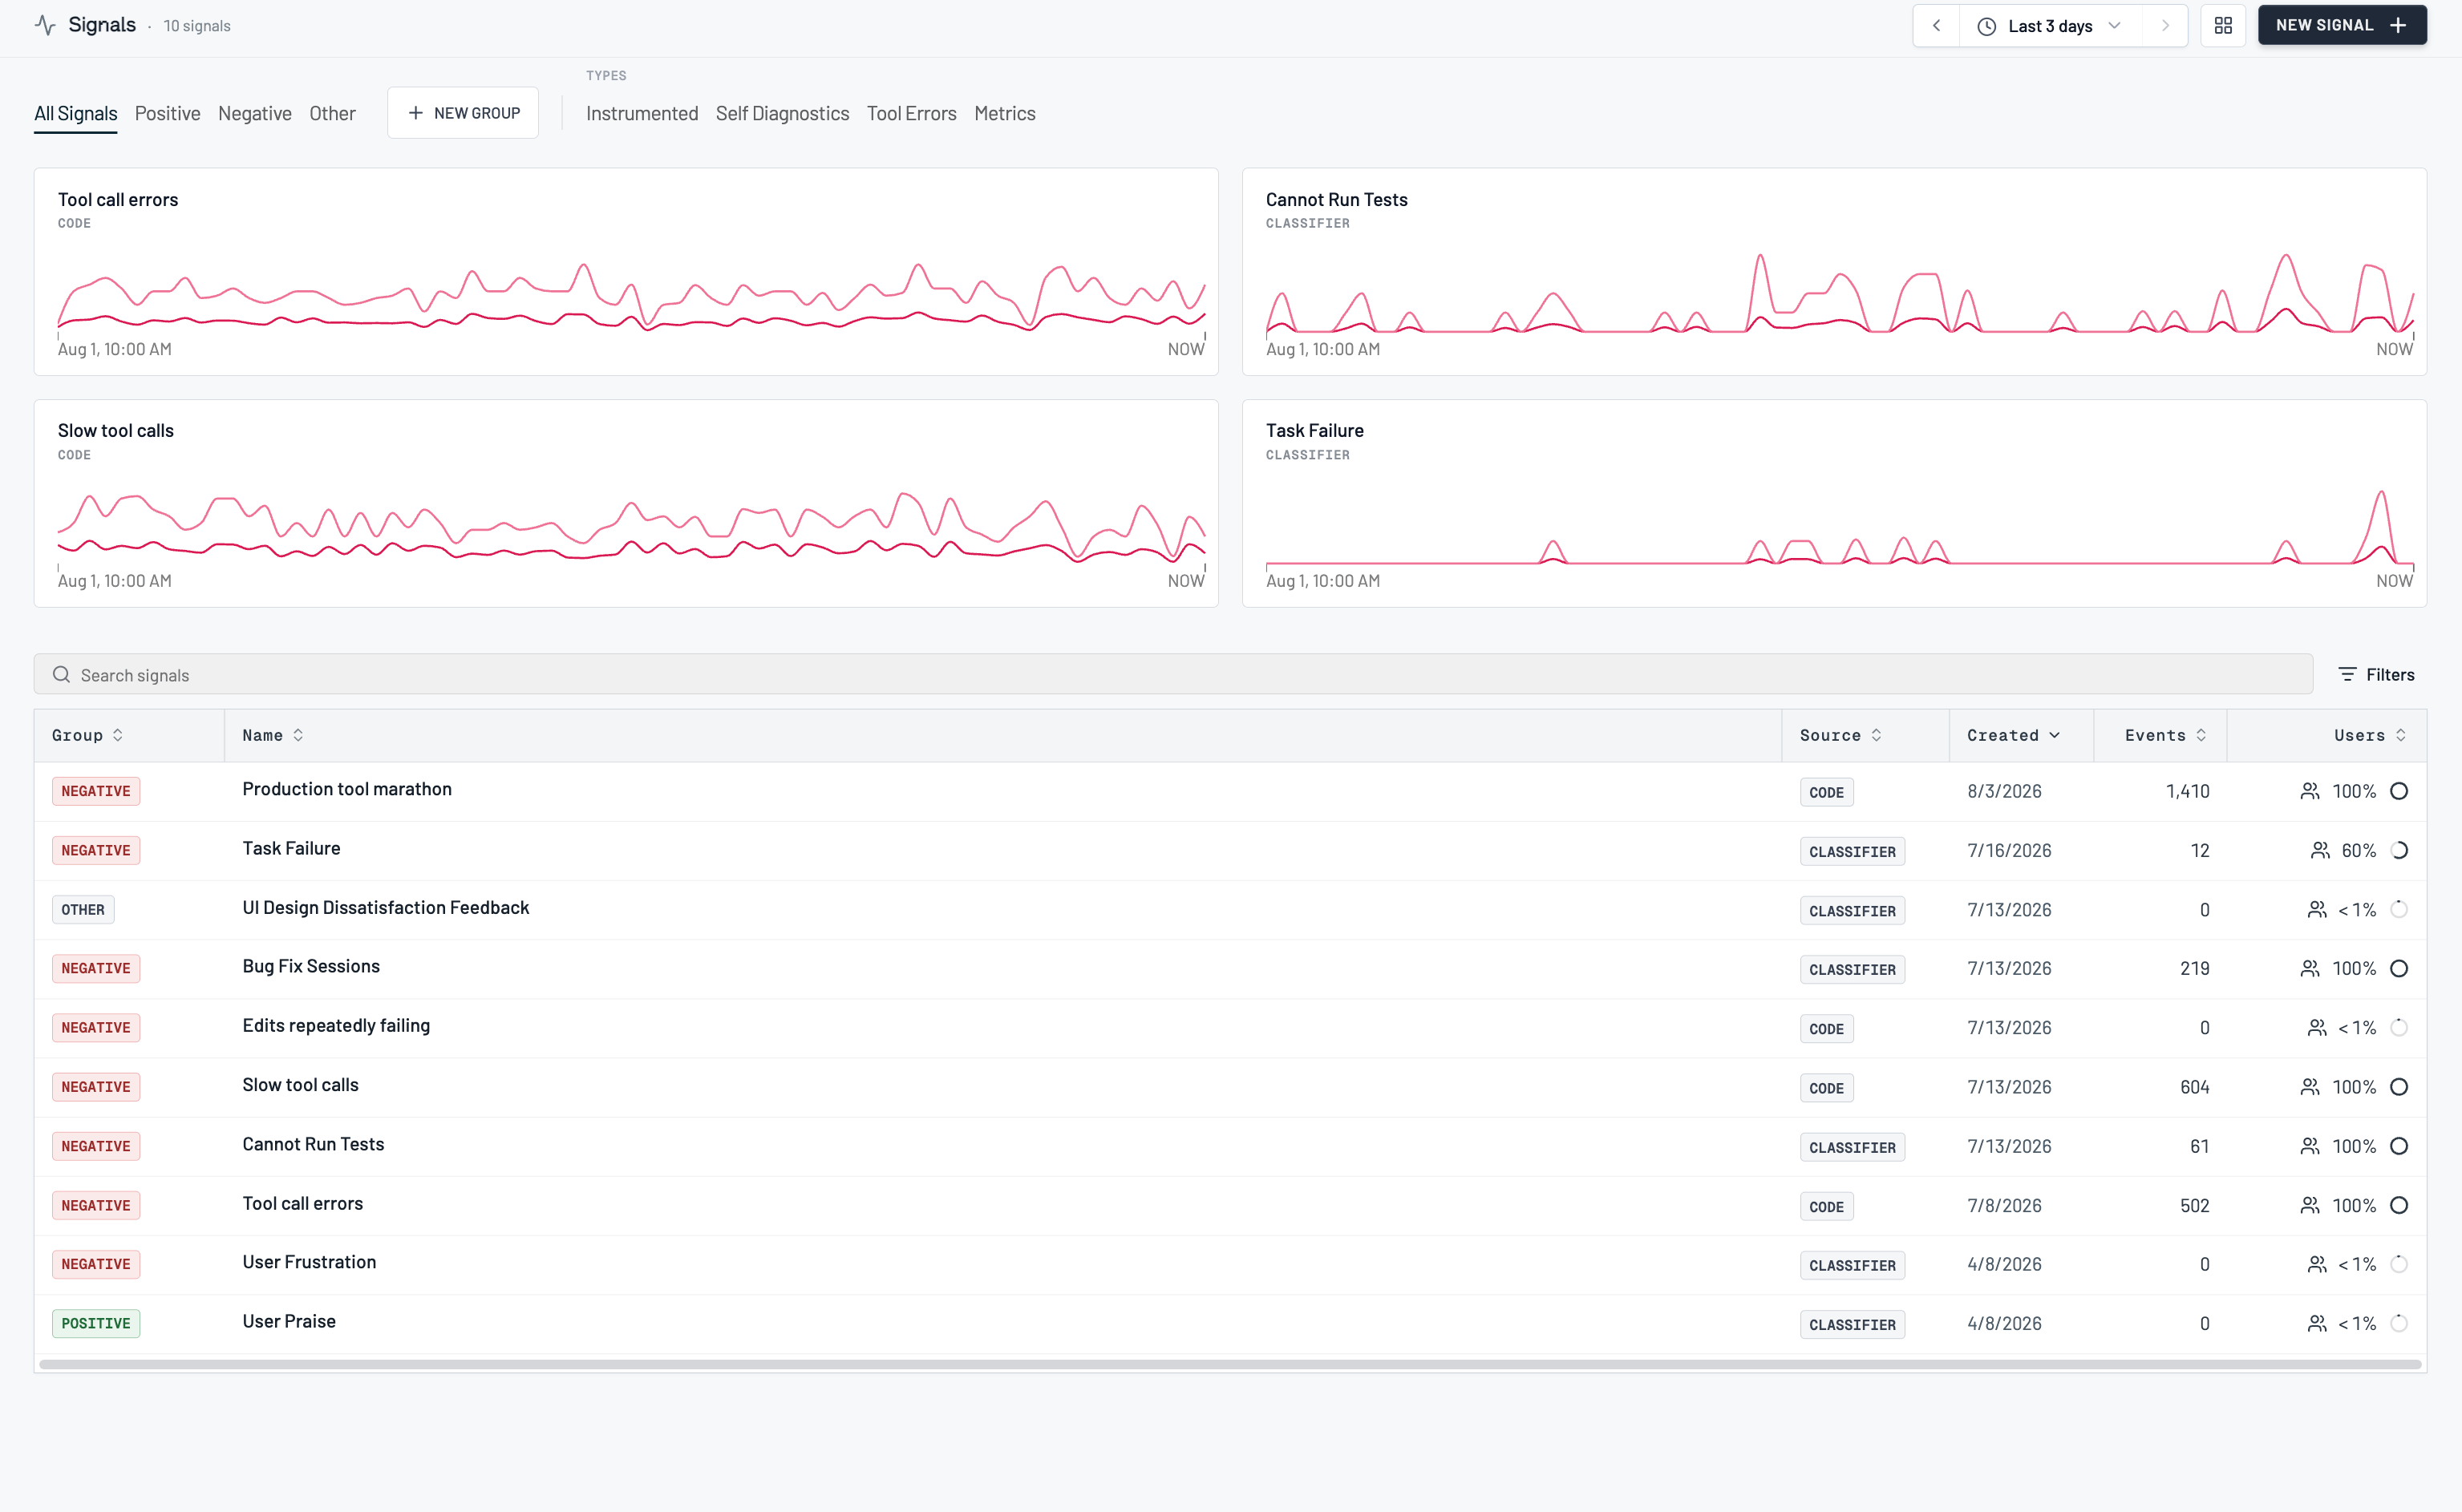
You create a signal by describing the behavior you want to track. Raindrop drafts a classifier from your description, runs it over a sample of your real events, and shows you what it matched. You label examples until the matches look right, then save. From then on the signal runs on every new event and backfills the last 90 days (sampled) so you have a rate to look at right away. Signals are grouped by sentiment (Positive, Negative, and Other) on the Signals page, and every matched event stays clickable so a rate always traces back to real conversations.Roles and permissions
- Signals is available on every plan, including the free Hobby plan.
- Each plan includes a number of custom signal slots: 1 on Hobby, 10 on Pro. Past Pro’s ten, capacity is an Enterprise conversation — see Plans and limits.
- Presets and SDK-tracked signals (below) do not count against your custom slots.
Using signals
Create a signal
1
Describe what you want to track
On the Signals page, click New Signal and describe the behavior in plain language. Being specific helps: “the agent makes more than five tool calls when the user is reporting a production issue” beats “too many tool calls”.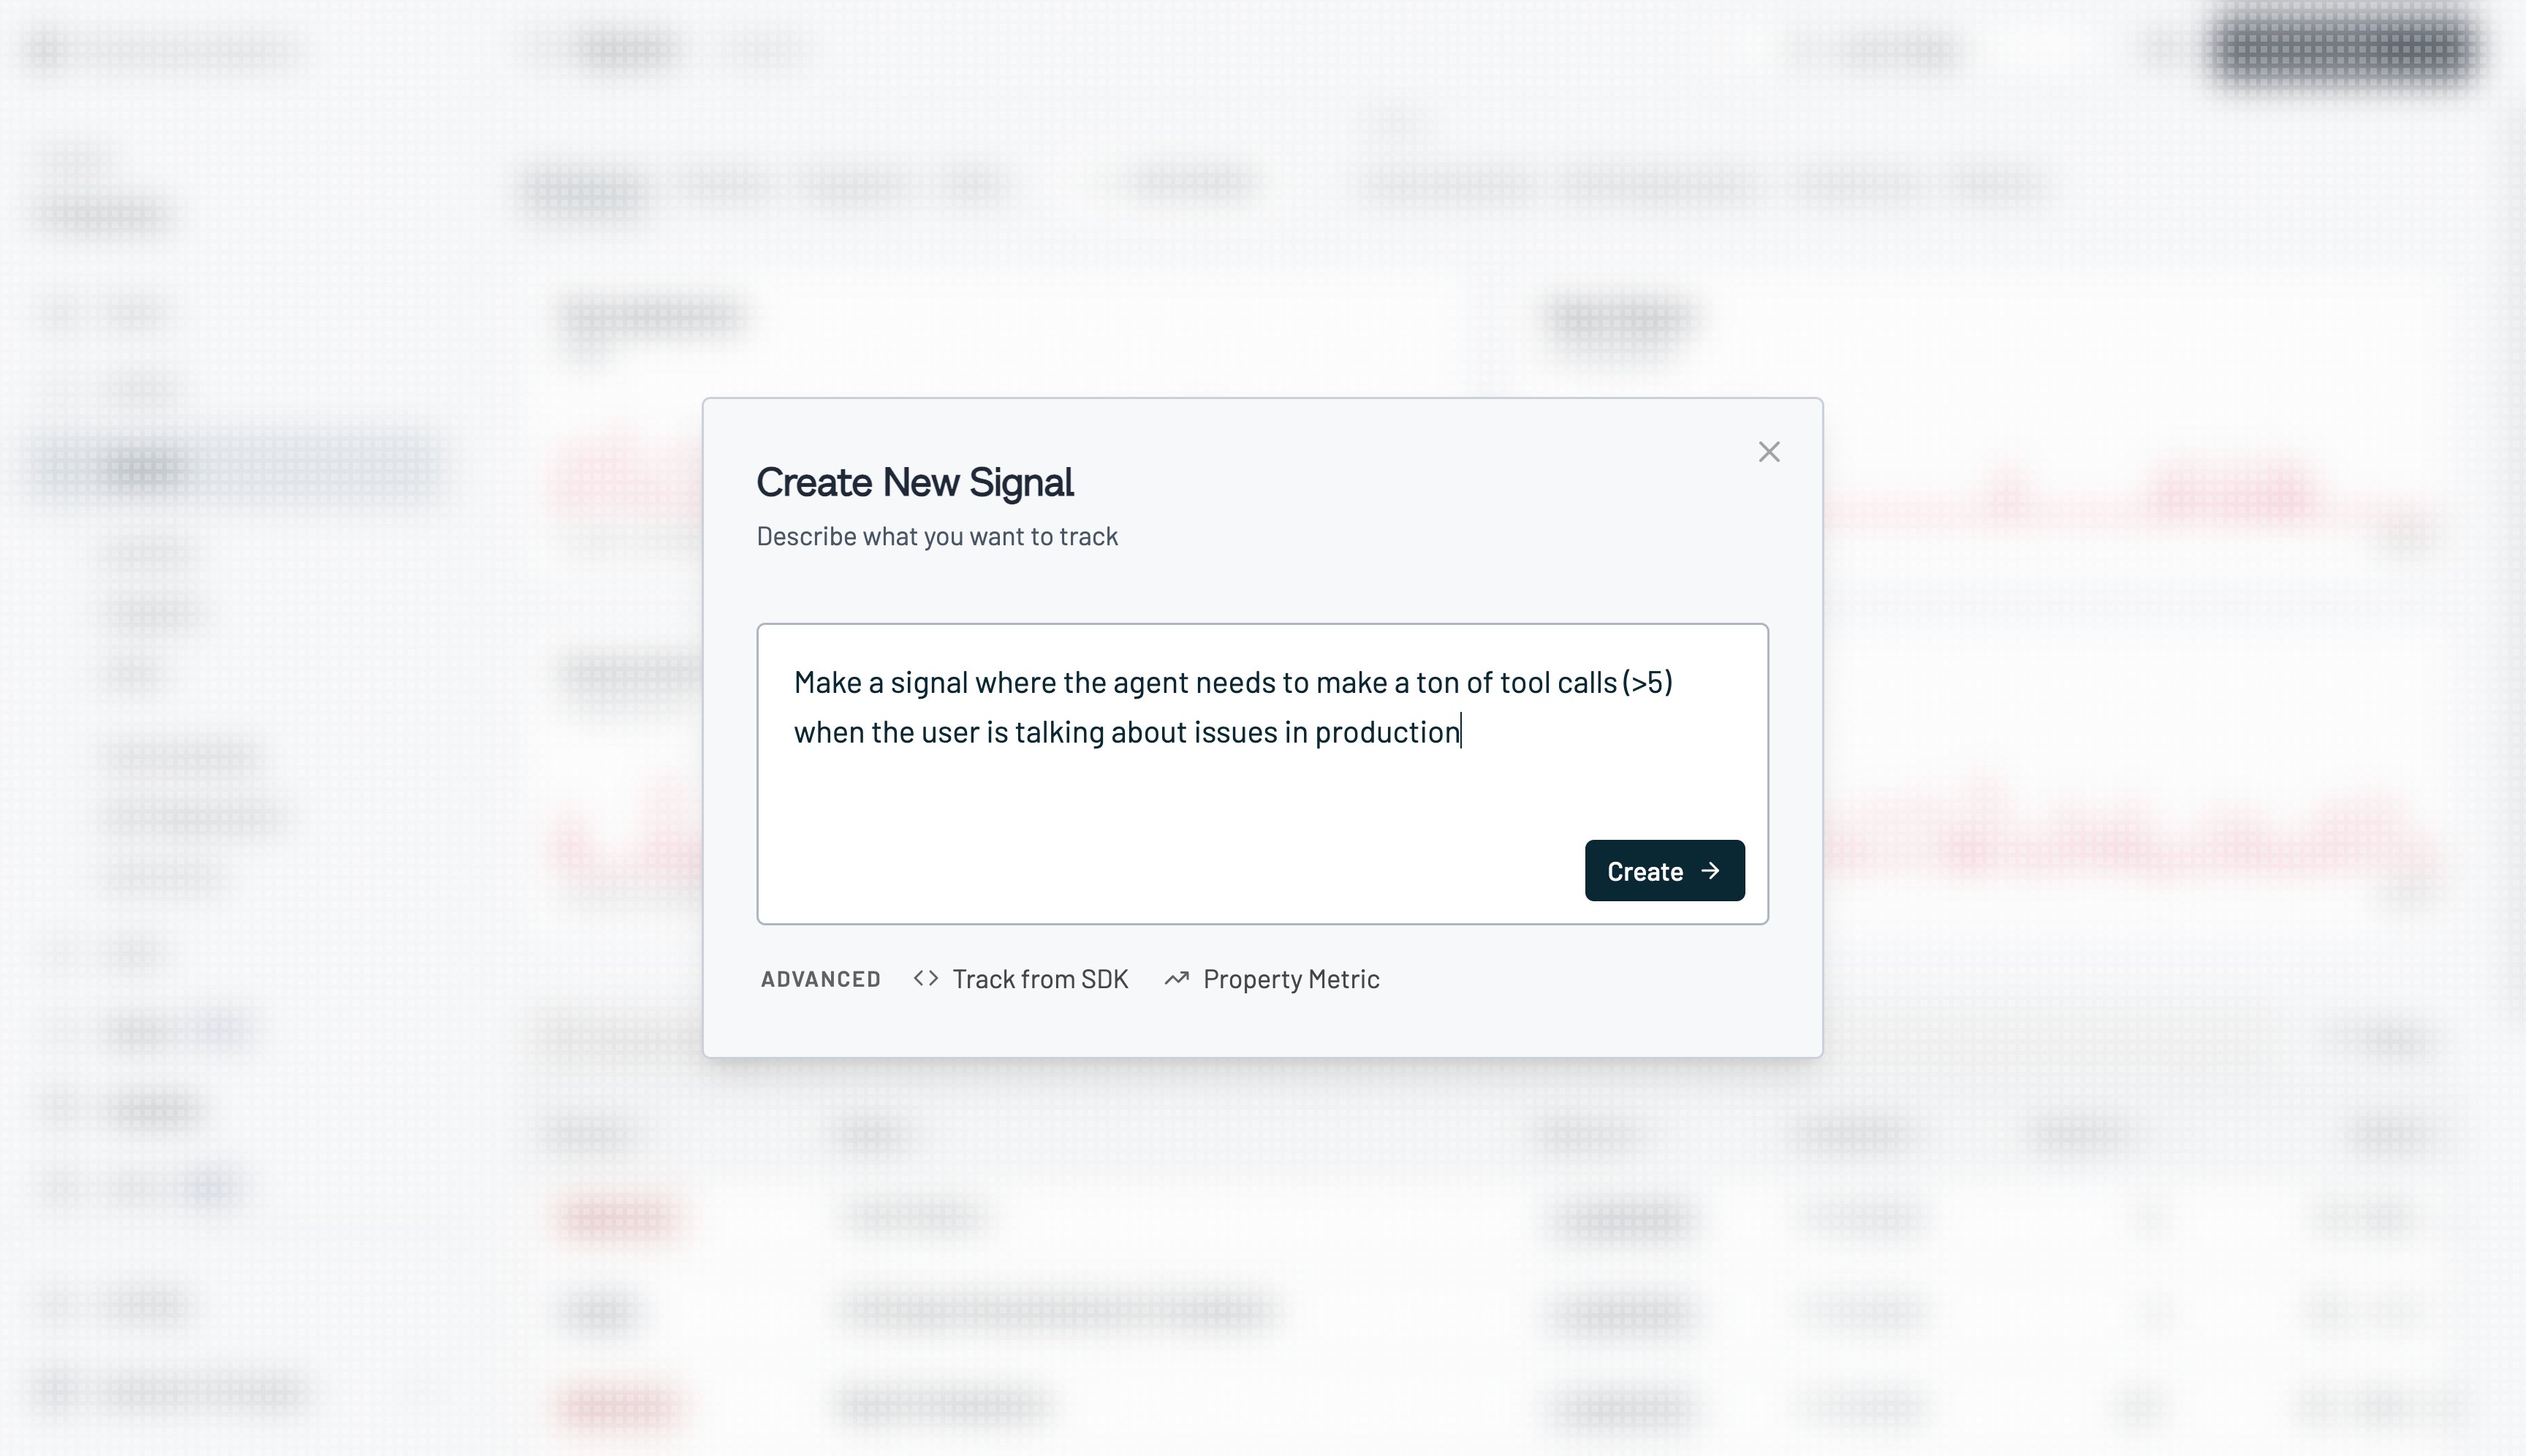
2
Raindrop drafts it
Describing a signal hands you to Raindrop’s agent in a conversation. It analyzes your traces, writes the policy rules that define the behavior, turns those into a classifier, and scans your events with it. The card tracks each of those steps as it goes.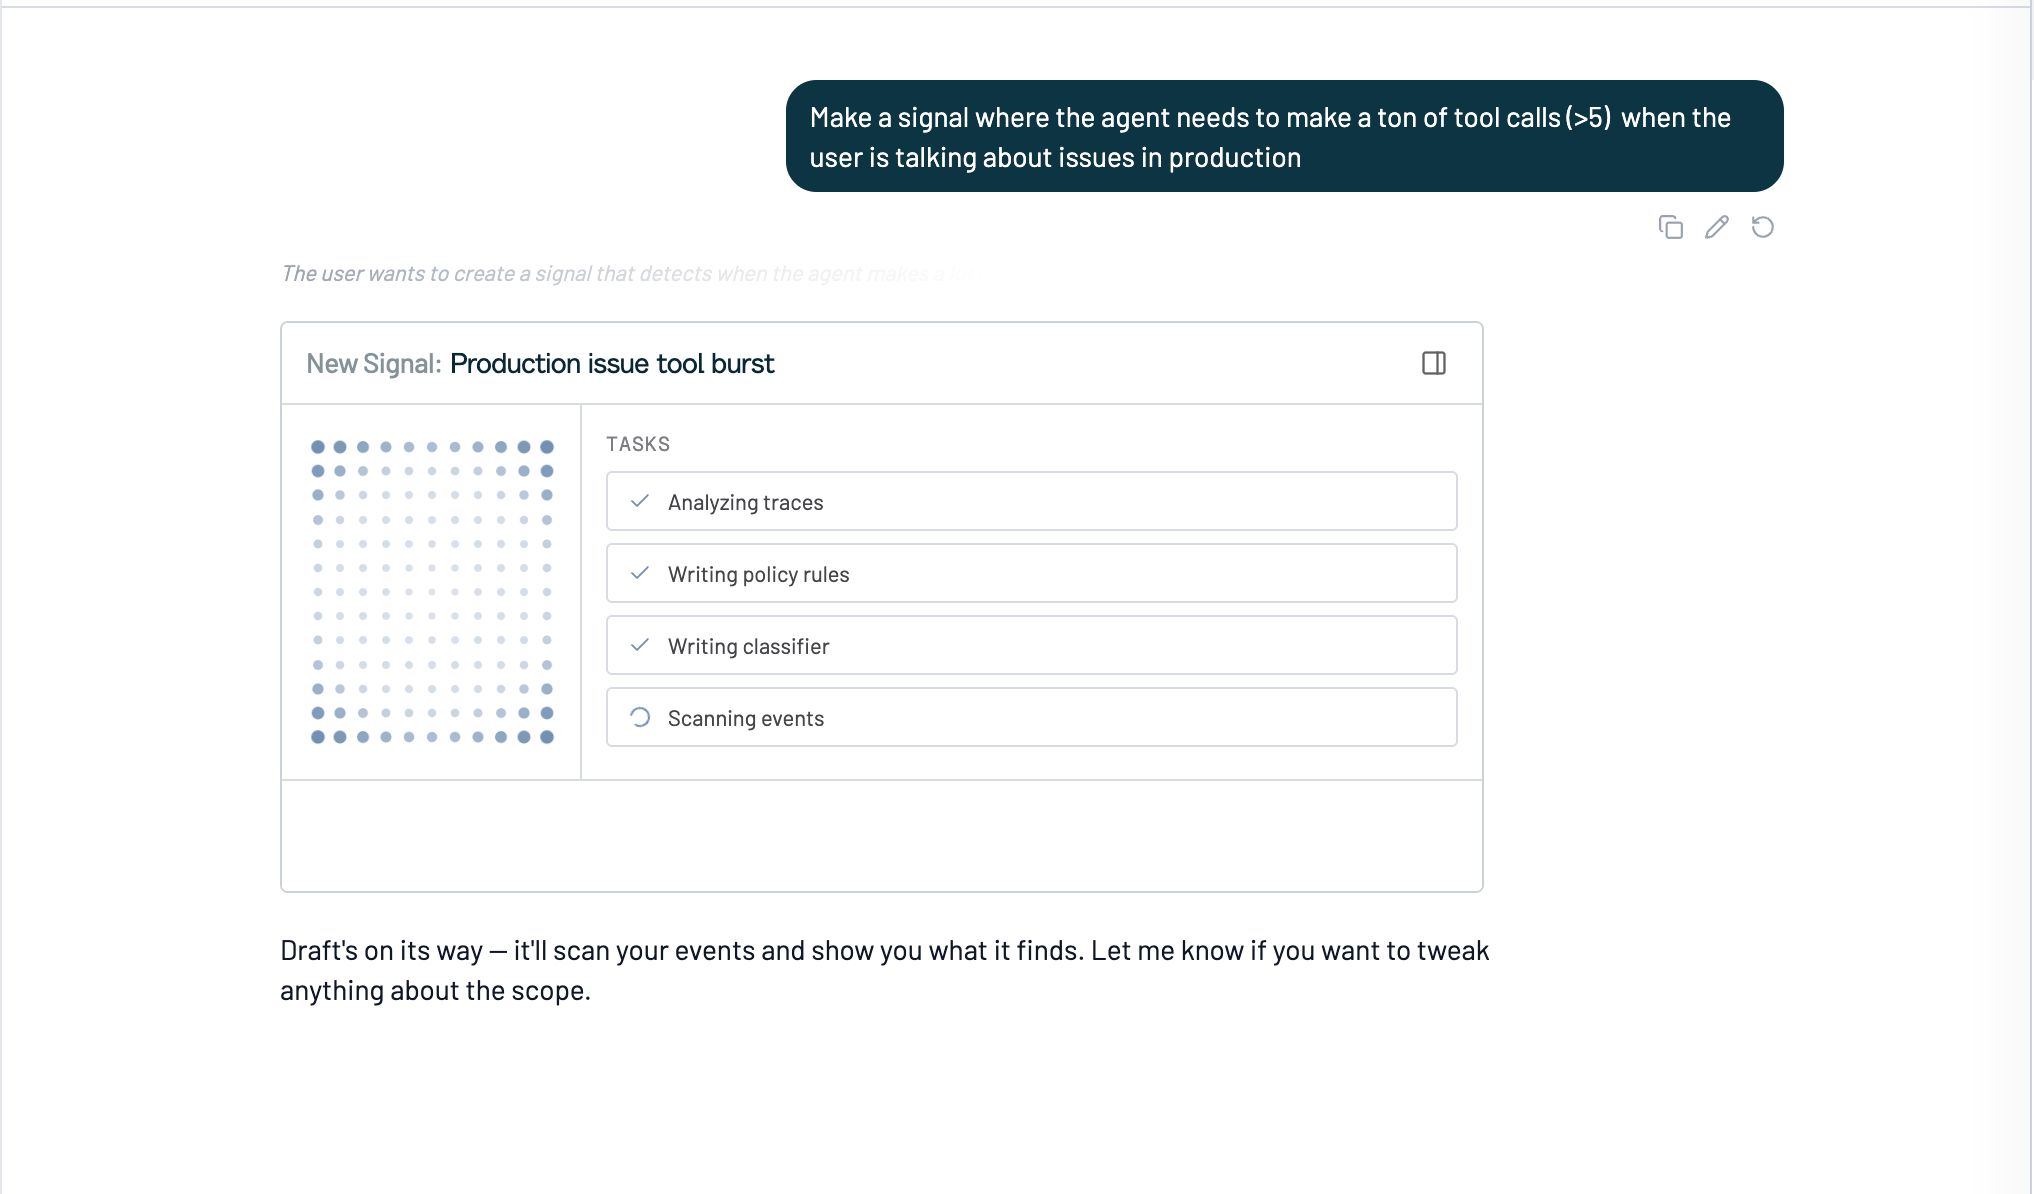
3
Review the matches
When the scan finishes the card tells you how many matched events are ready to review. Open the review panel and Raindrop walks you through them one at a time, with why it thinks each one is a match and the conversation itself alongside. Mark each Match or Not Match, and use the ← and → arrow keys to move between events.You don’t need to label every event. Raindrop surfaces a sample, not a checklist: label until the matches look right, then create the signal. If the signal draft is missing the point, tell it what to change in the chat, or press Run Again to fold your labels into the policy and rescan.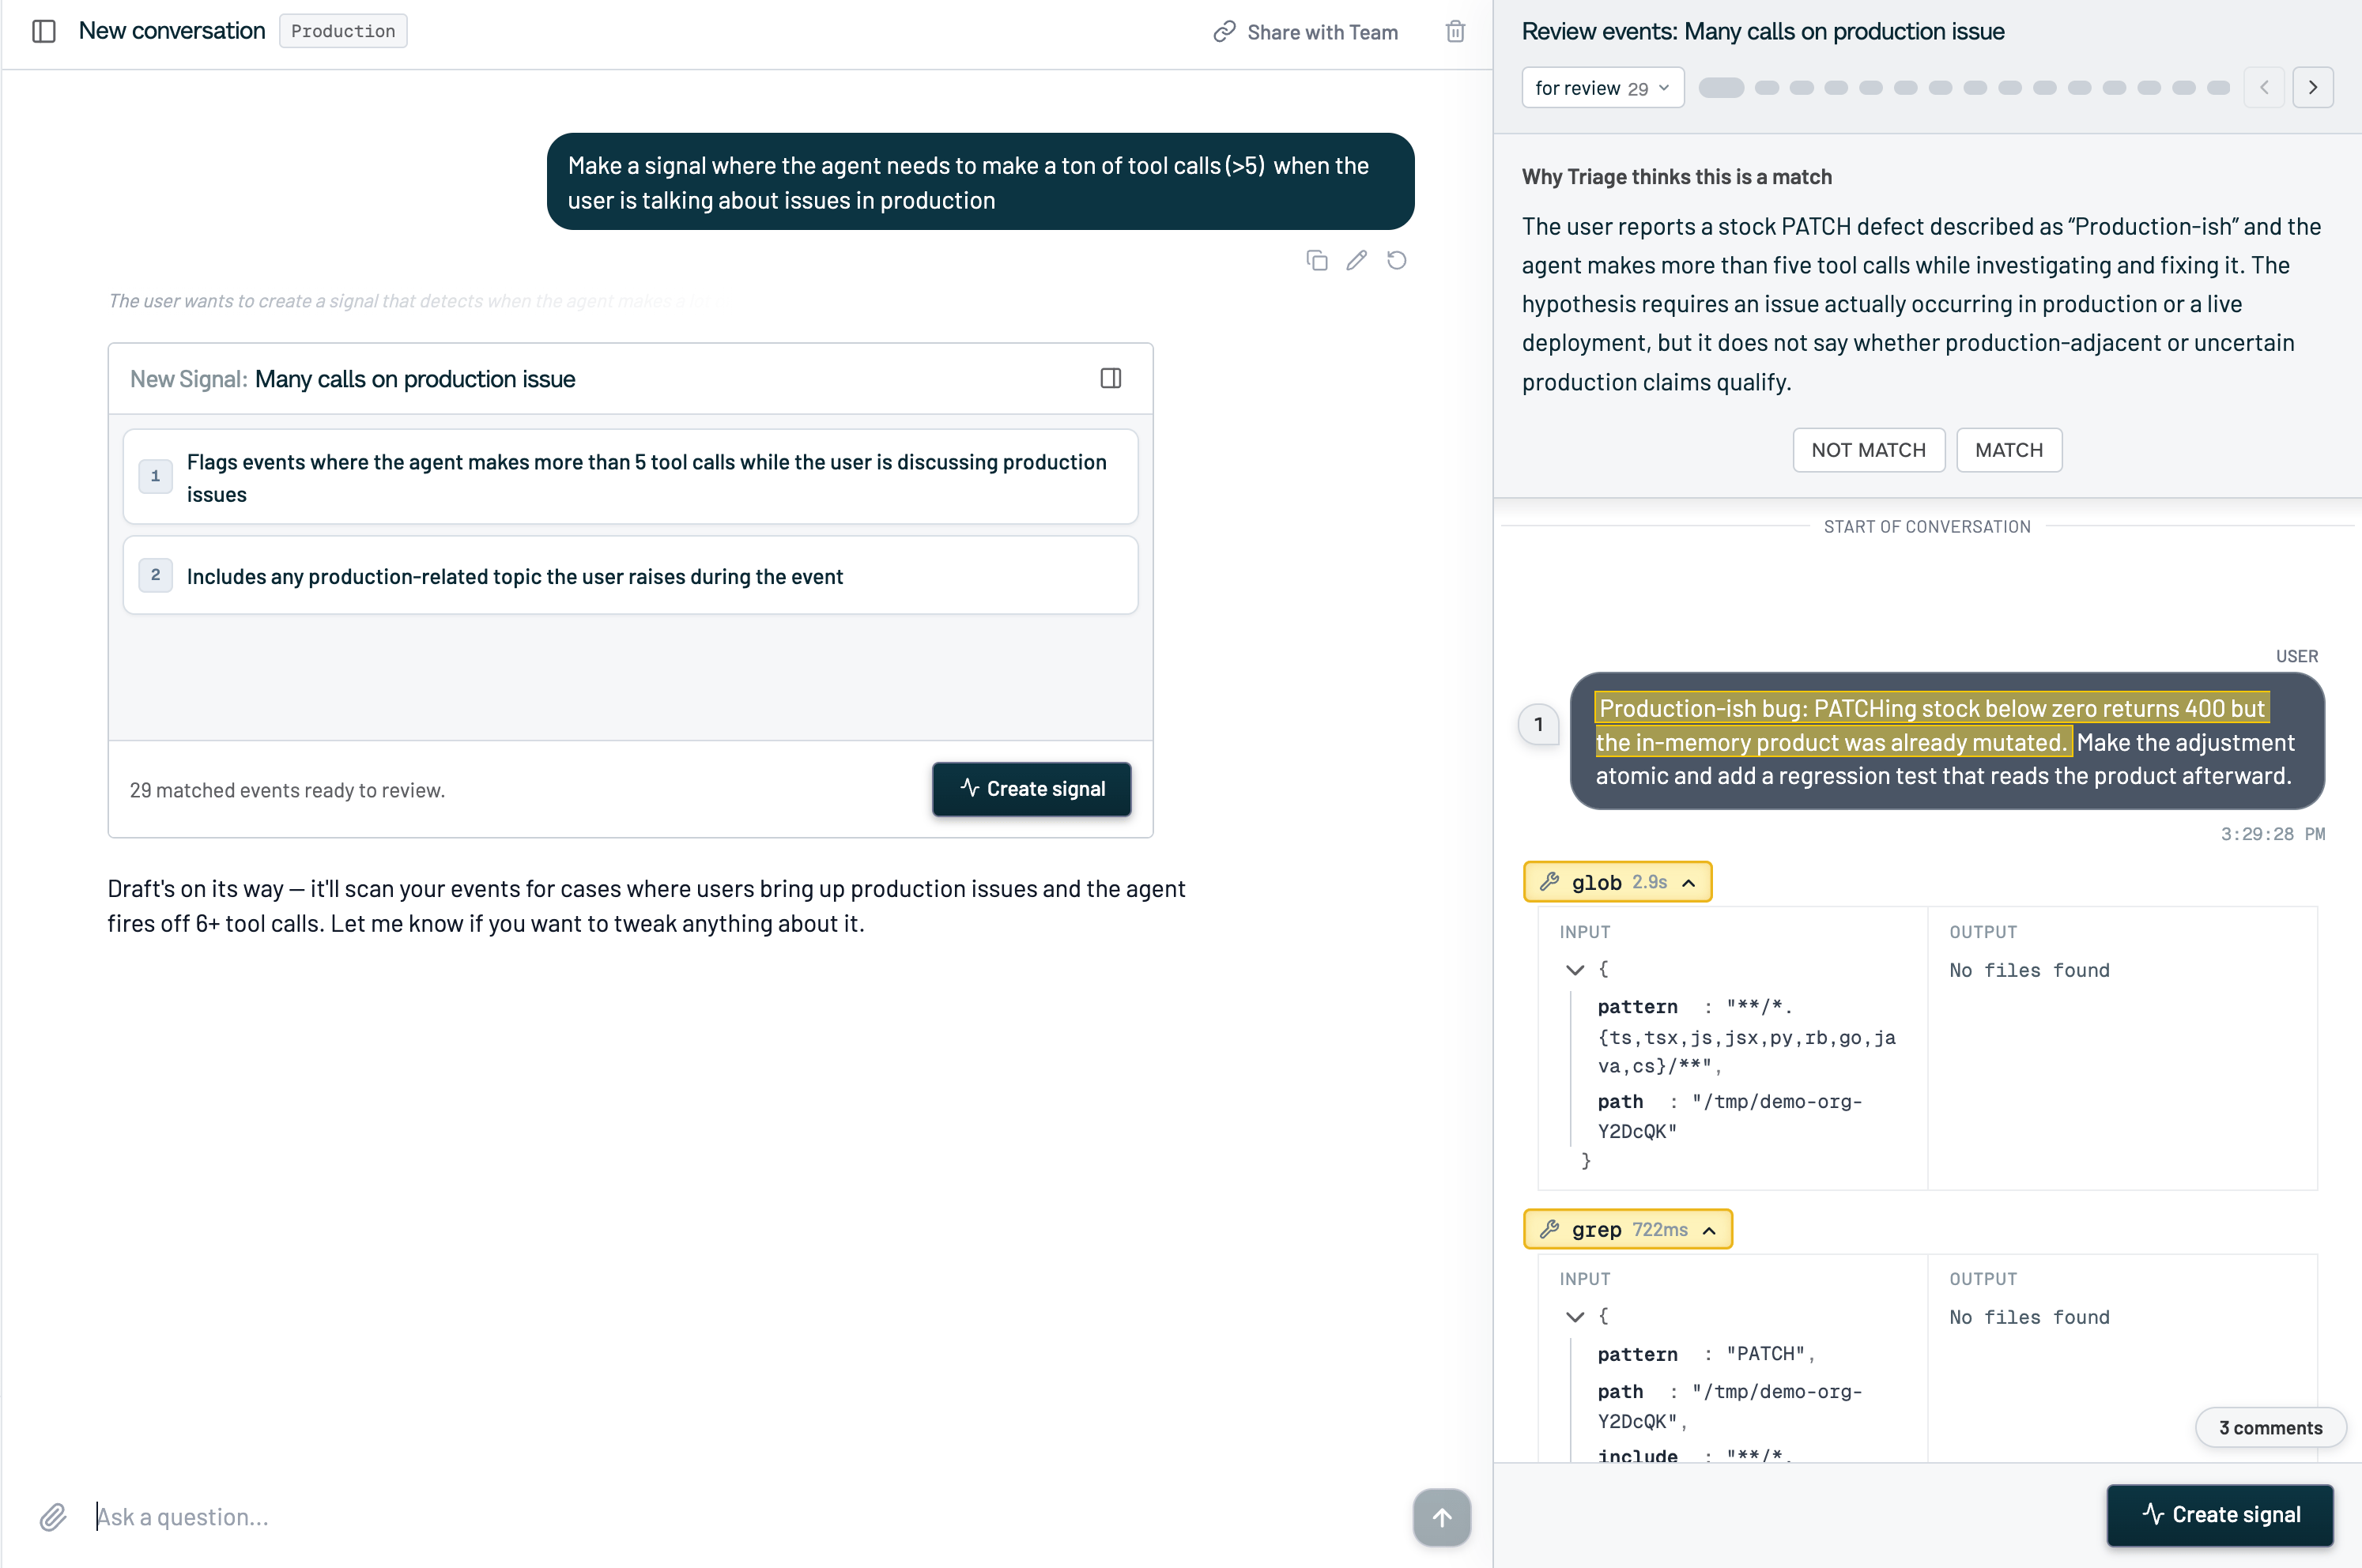
4
Check the policy rules
The card lists the numbered rules the agent settled on, so you can read the definition in plain language rather than in code. Ask it in chat to add, drop, or narrow a rule and it redrafts. When the rules read right, click Create signal.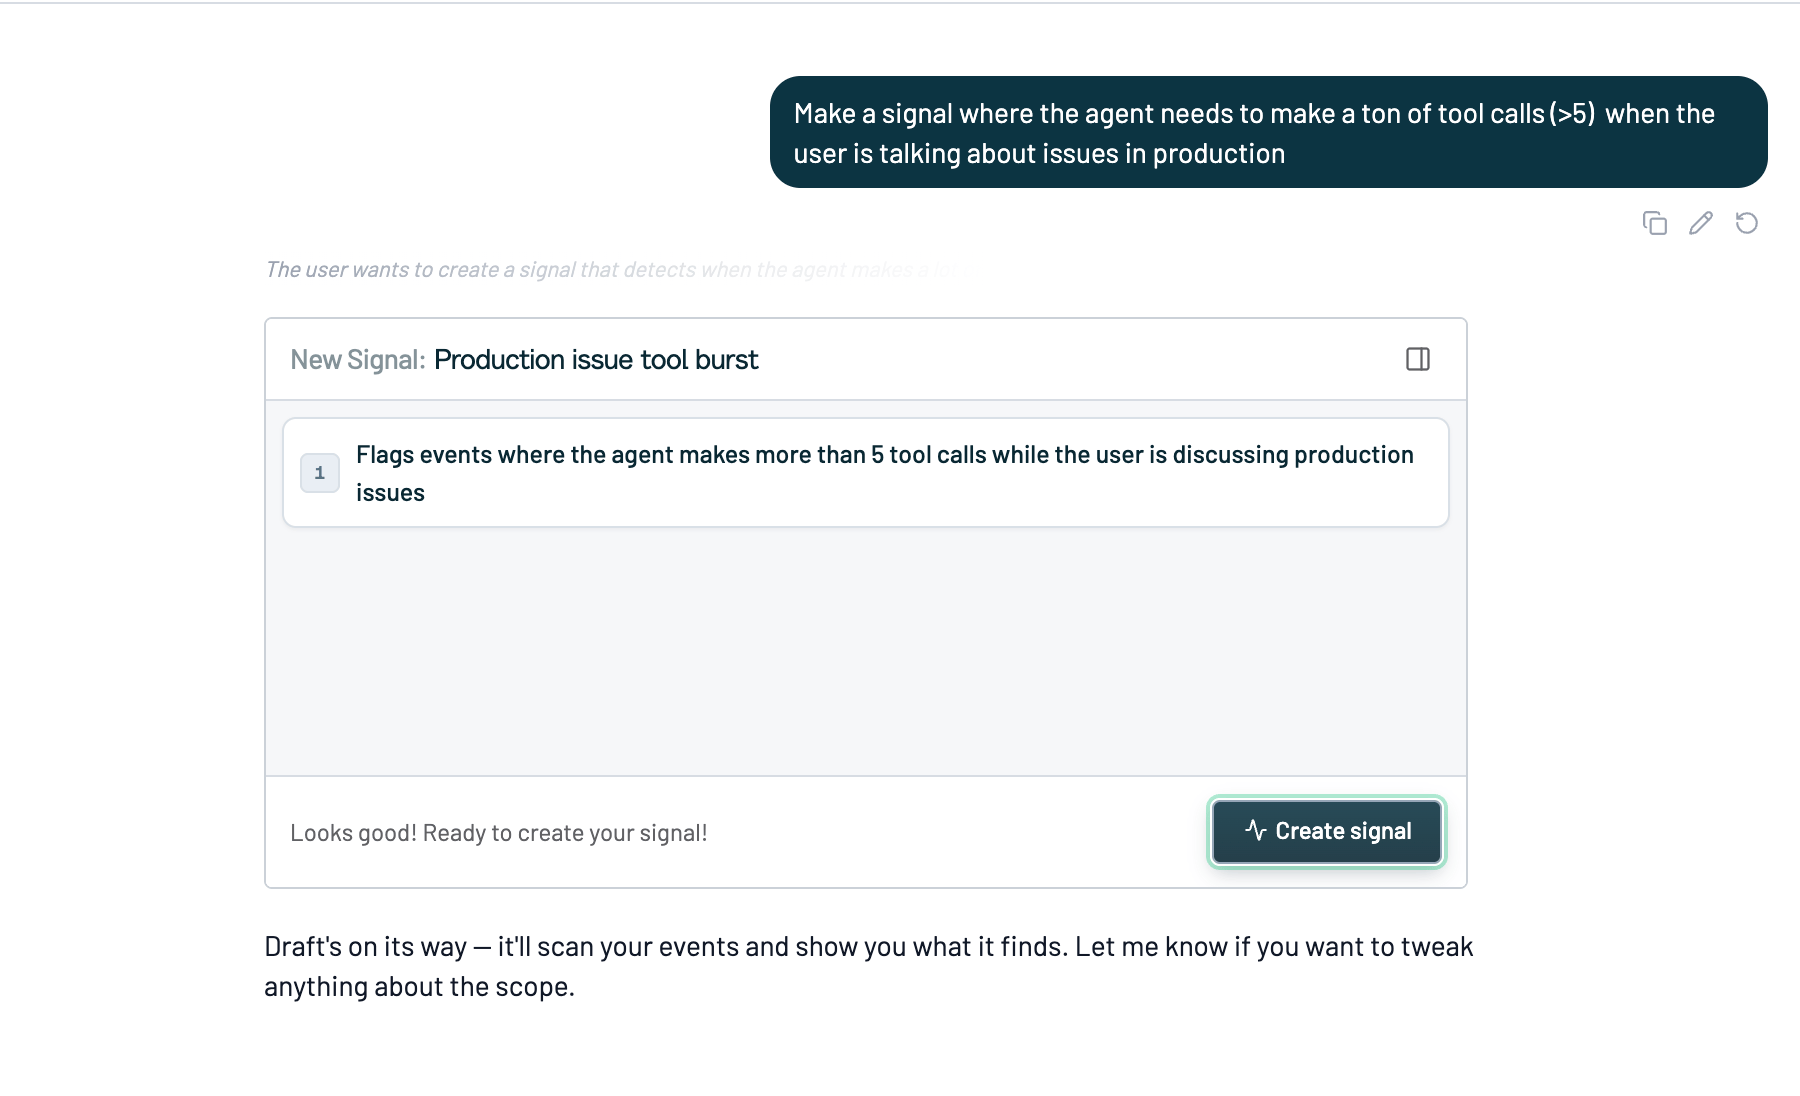
5
Name it and create it
Confirm the name, description, and sentiment (Positive, Negative, or Other, which sets the group it lands in on the Signals page). You can expand Preview classifier code to read the classifier before you commit.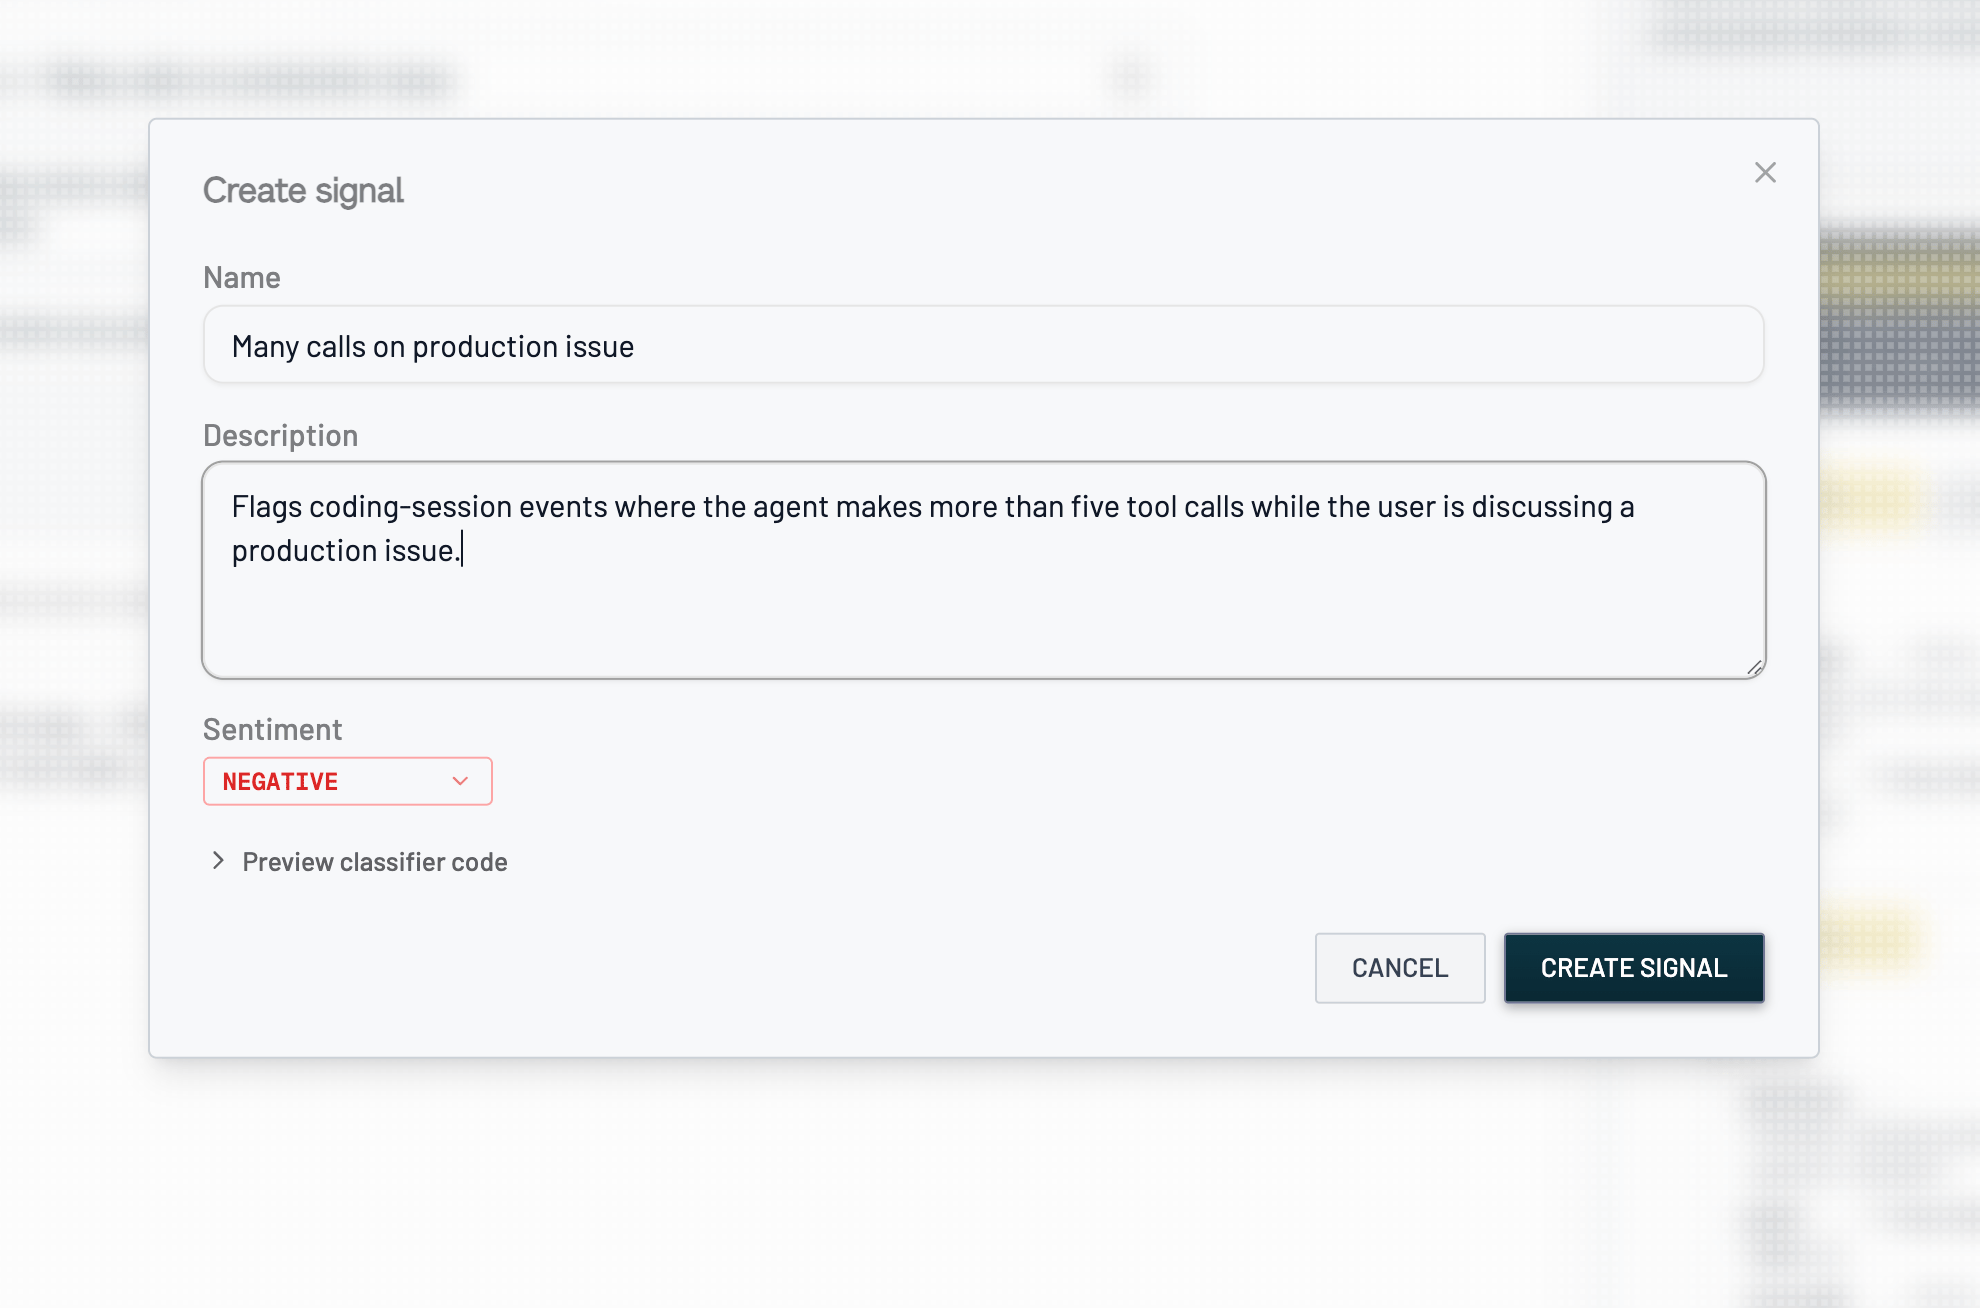
6
Watch it track
The signal starts labeling every new event and backfills the last 90 days (sampled), so you get a rate and the matching conversations right away.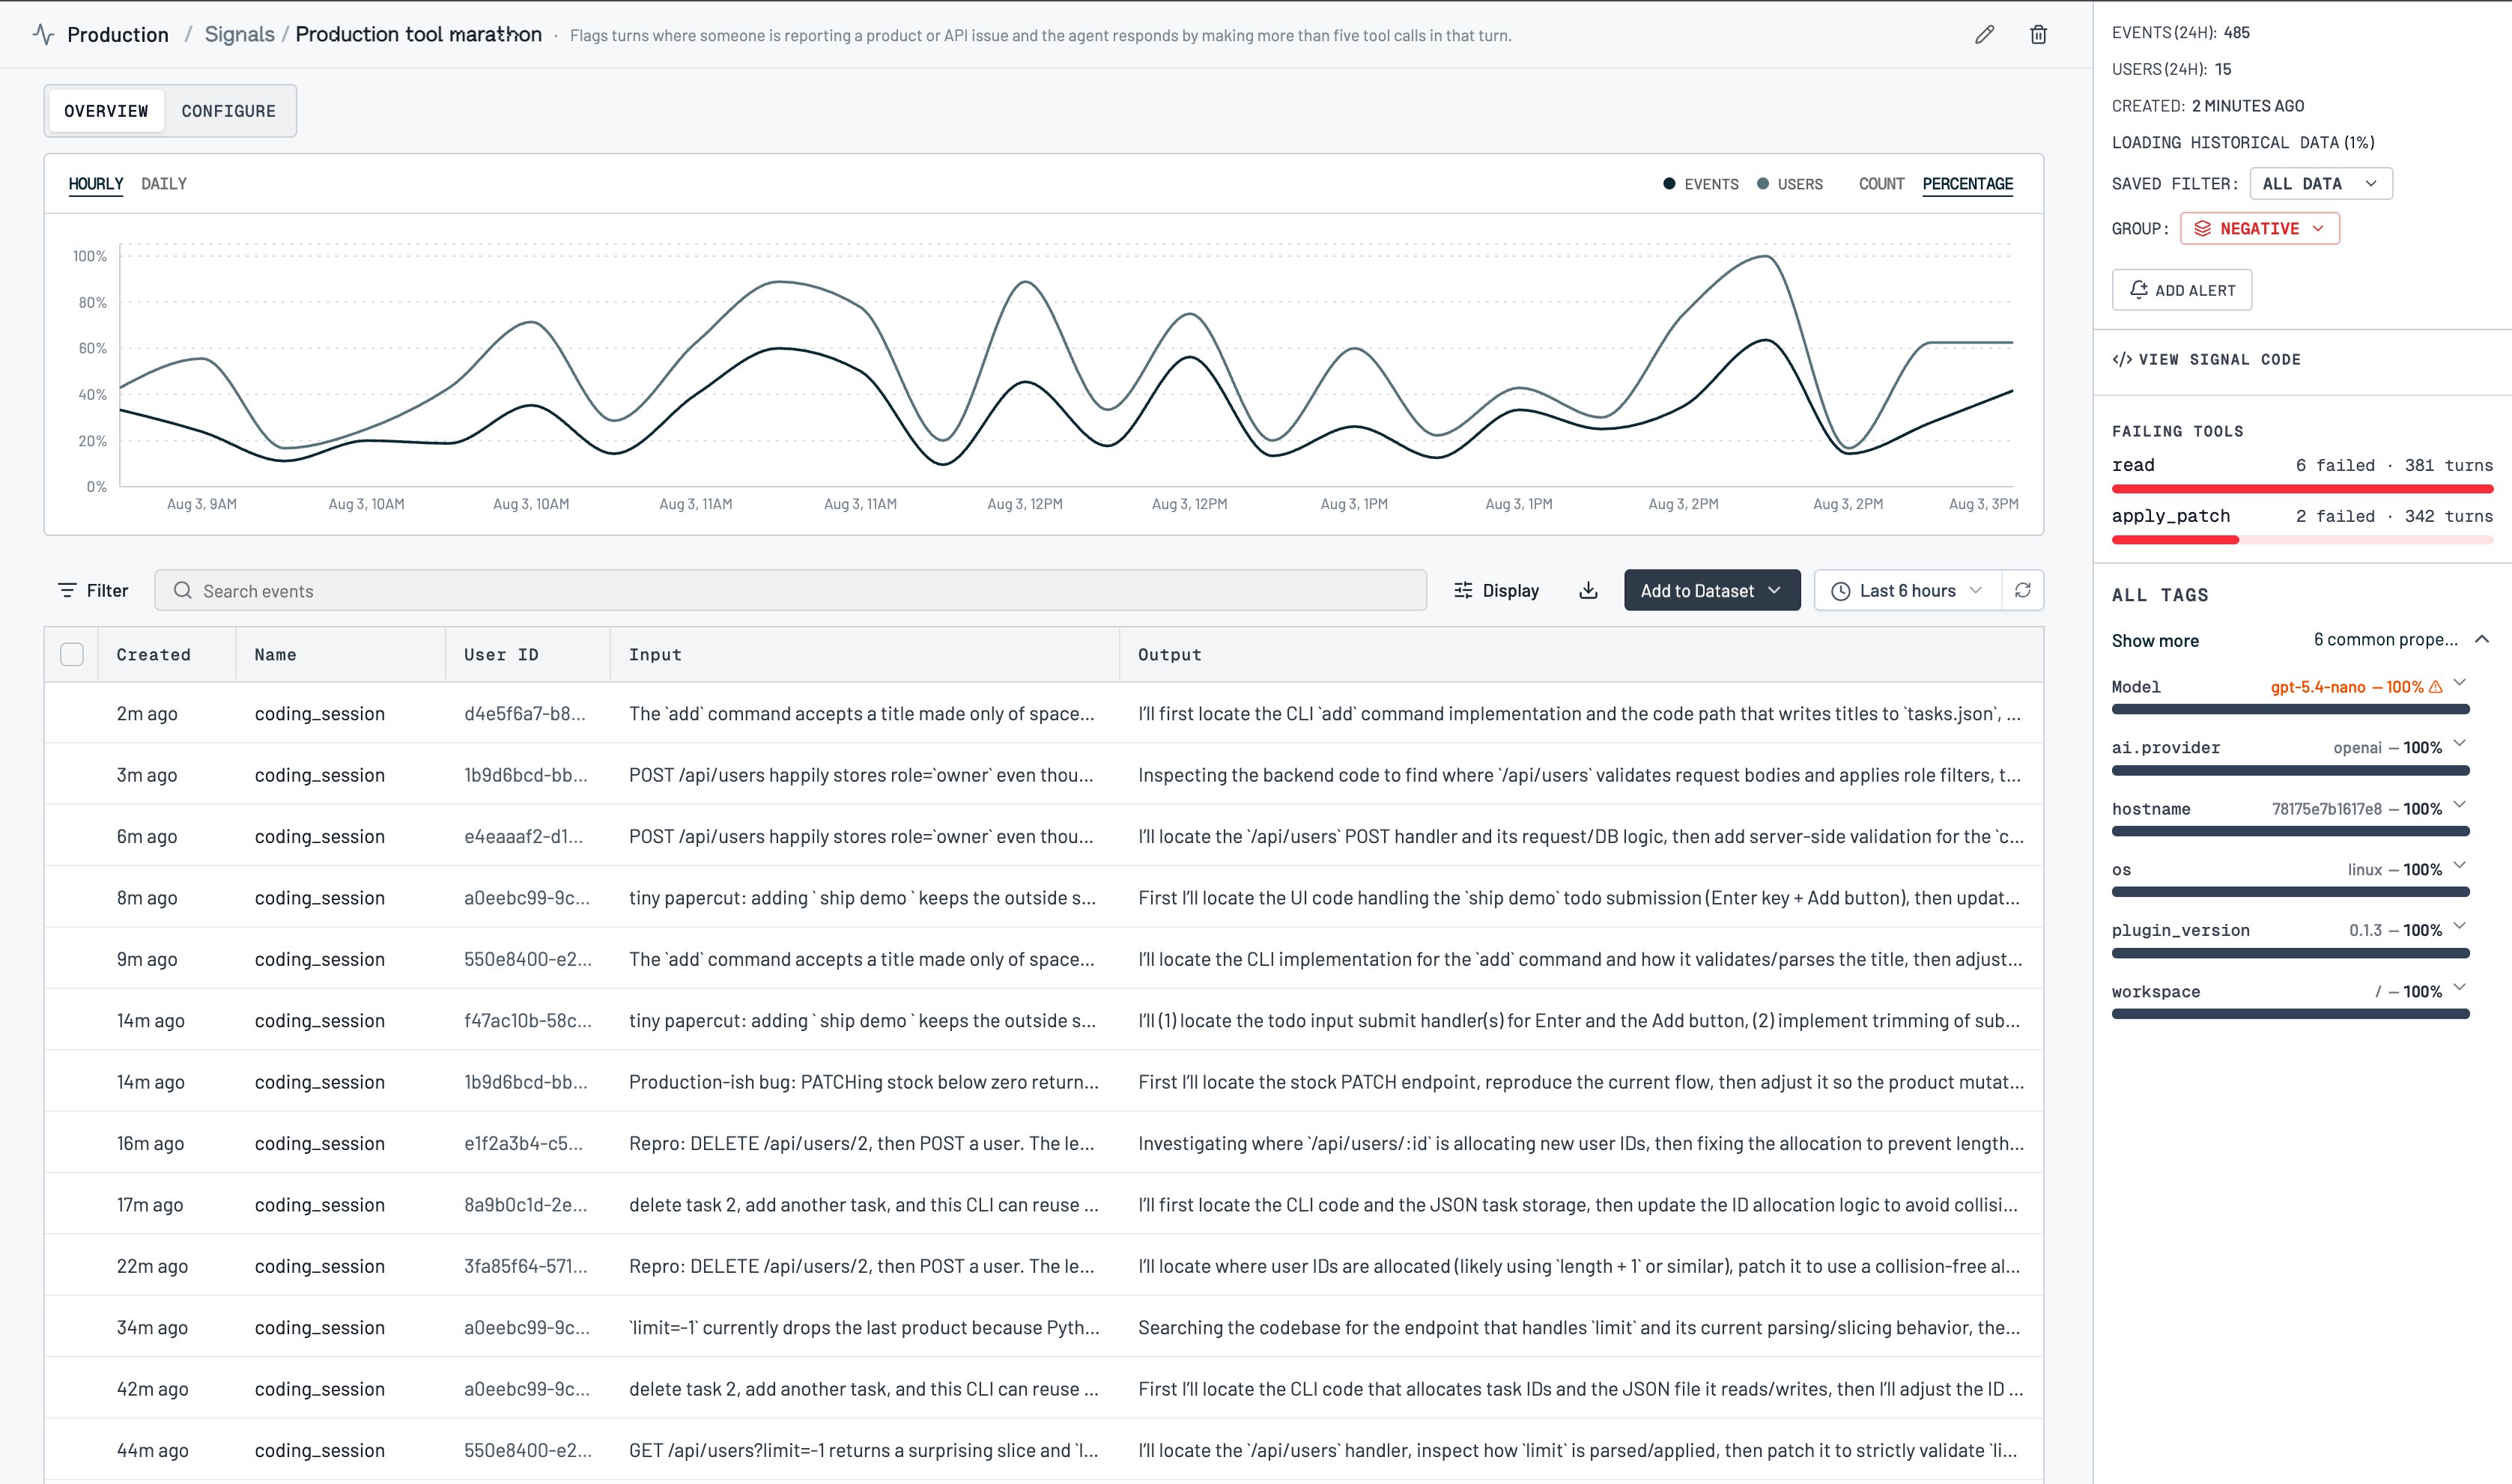
Create a signal from your coding agent
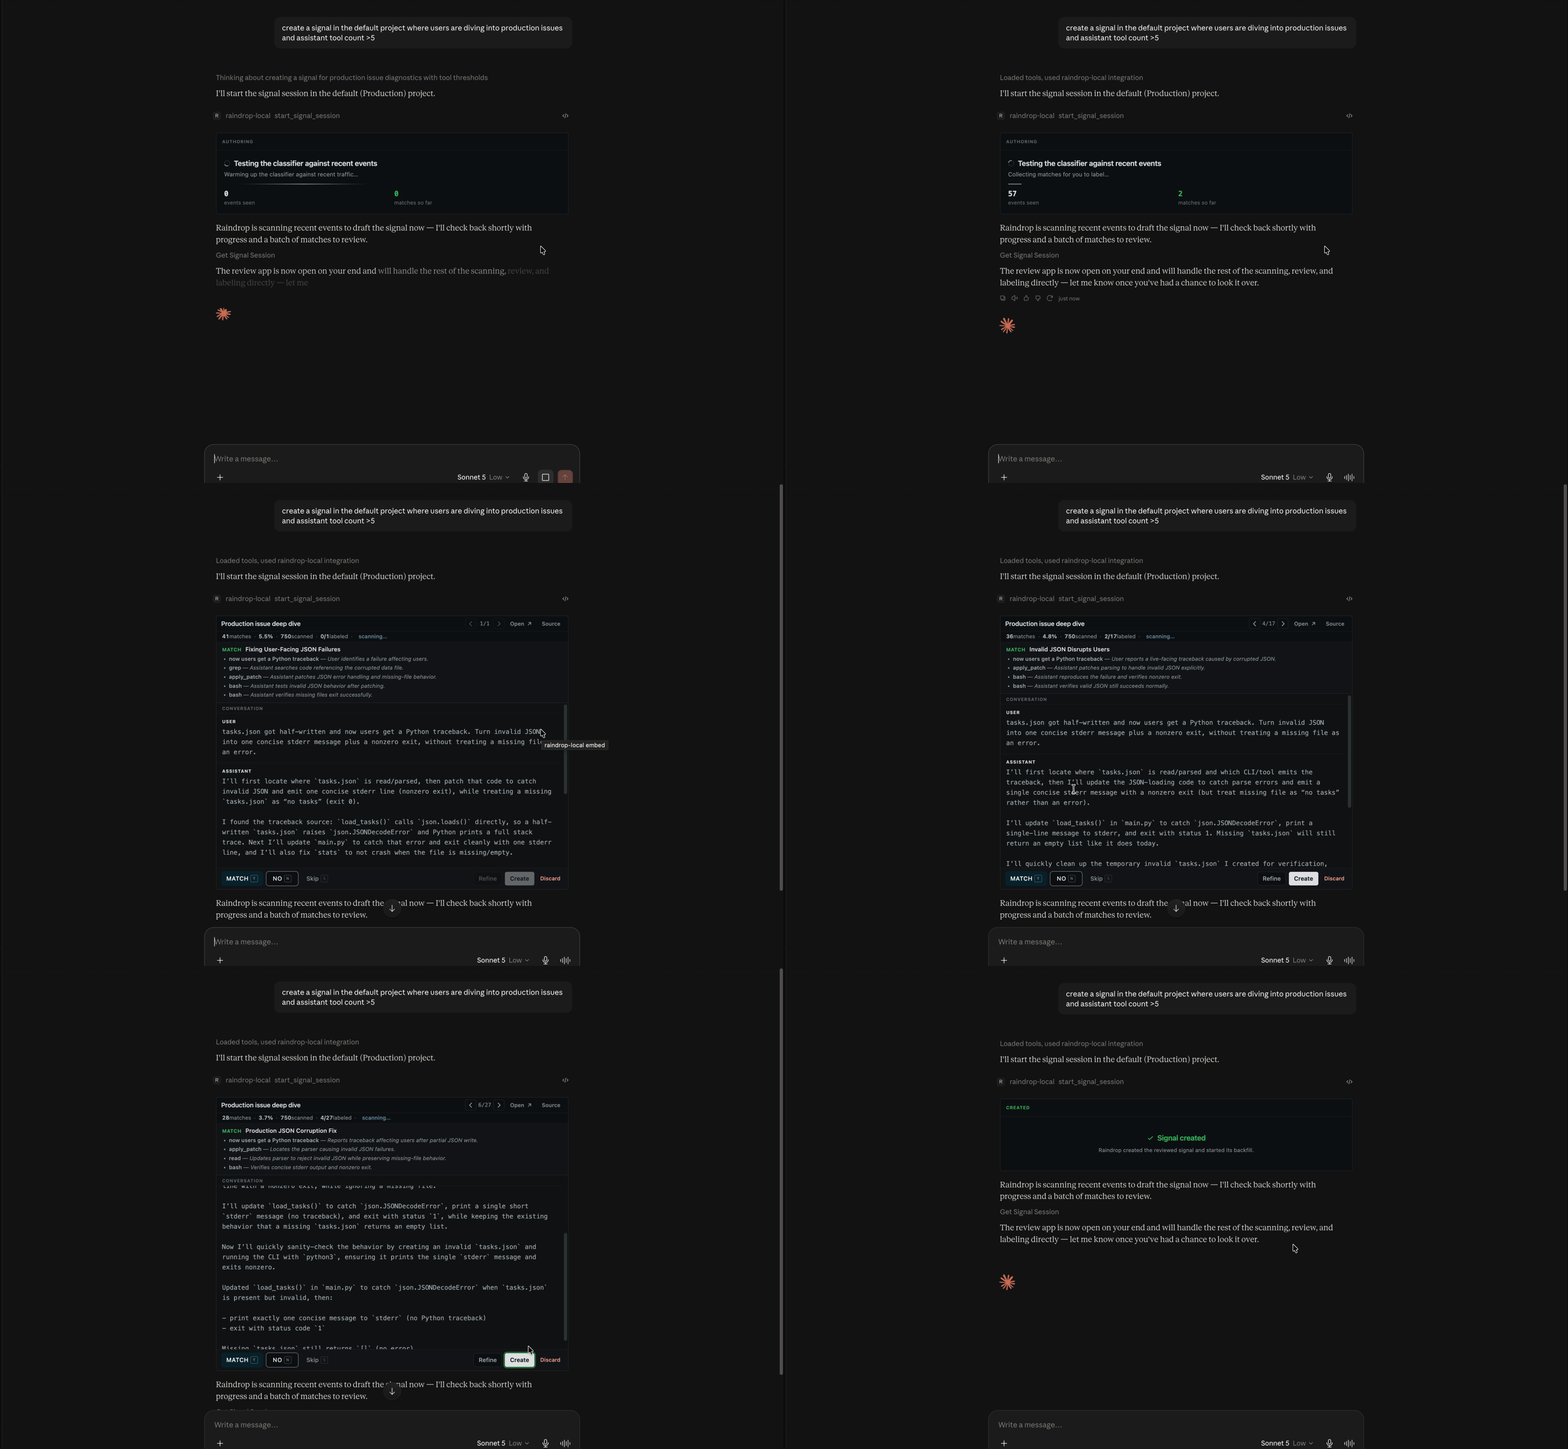
You can author a signal from any MCP client (Claude Code, Devin, Codex, Cursor, or your own tool) without opening the dashboard. Ask it to create a signal and describe the behavior; Raindrop runs the same flow through the MCP tools:- It starts an authoring session and reports progress as Raindrop drafts the classifier and scans your traffic, with events seen and matches so far.
- Review and labeling happen in Raindrop’s review app, which opens right inside clients that support MCP apps. In clients that don’t, your agent walks you through the same examples in chat — full input, output, and tool calls — and you answer Match, No match, or Skip.
- Either way you can send it a note to widen or narrow the definition and it rescans.
- On your confirmation, Raindrop creates the signal and reports the matched count, match rate, and total scanned.
write:signals). MCP clients can also read your existing signals and their counts to pull them into an investigation or your editor. See the MCP overview for setup.
Adjust a signal after it’s live
A signal isn’t frozen once you create it. Open it, select the events it got wrong in the events table, and click Refine Signal. Raindrop records those events as confirmed non-matches and opens an agent conversation seeded with the signal’s current definition and every verdict you’ve given it so far. Tell the agent what should change and it updates that signal in place, so the corrections carry over to new events.Start from a preset
Raindrop ships a set of ready-made signals you can turn on from Add Signal → presets on any plan, no drafting required. They don’t count against your custom signal slots, so they stay available even when you’re at your limit:- User Frustration: user expressing frustration at the agent
- Task Failure: agent failing to complete its task
- Forgetting: agent losing important context about the user
- Refusals: agent declining or refusing a request
- Jailbreaking: user attempting prompt injection or other manipulation
- NSFW: explicit content, violence, or self-harm
- User Praise: user thanking or complimenting the agent
Track signals from your app
Some signals are best sent directly from your product rather than inferred, such as thumbs up / down, regenerations, and shares. Track these with the SDK and they show up under the Instrumented tab:Reference
Where signals come from
Backfill
A newly created signal backfills the last 90 days of events when it’s saved, sampled to stay within budget, so you have a rate to look at immediately. Instrumented, preset, and tool-error signals reflect data from when they’re enabled onward.Troubleshooting
New Signal is disabled. You’ve used all your custom signal slots — one on Hobby, ten on Pro. Archive a signal to free a slot, upgrade your plan, or — if you’re on Pro — contact sales about Enterprise capacity. Presets and SDK-tracked signals don’t count toward the limit. A signal is matching too much or too little. Open it and refine it: select the events it got wrong, click Refine Signal, and tell the agent what should change. You can do this any time, not just at creation.Related
- Events for the conversations behind a signal
- Issues when a behavior becomes a broader distribution change
- Triage Agent to create signals straight from a Slack investigation
- Self Diagnostics for agent-reported signals
- Alerts to get notified when a signal spikes
- MCP overview to create and read signals from your coding agent